Picture the moment when you catch sight of your fingertips glimmering under a beam of light. There’s an almost magical feel to seeing those sparkly grains twinkle with each move you make, like you’re carrying a slice of enchantment wherever you go. If you’ve ever yearned for that feeling of empowerment or wanted to infuse a bit of dazzle into a routine day, glitter nails can be your path to an instant transformation. You stand at the center of this quest, choosing how to weave color, sparkle, and personal touches into an expression of who you are.
Even if you’re a newcomer to glitter nail art, there’s no need to feel overwhelmed. This guide arms you with all the knowledge and insights you need, from the foundational tools to advanced techniques, so you can confidently embark on your shimmering nail journey. By focusing on the “you” behind the manicure, this piece aims to give you an experience that isn’t just about painting your nails but about elevating your mood every time you glance down at your hands. Let’s unravel the secrets behind glitter nail art and reveal how you can create show-stopping fingertips that resonate with your unique sense of glamour.
Table of Contents
Why Glitter Nail Art is the Perfect Choice
Universal Appeal
Glitter nail art embraces versatility in a way few other beauty trends can. You don’t have to limit yourself to a specific event or dress code. Whether you’re attending a formal gathering, stepping out with friends, or just looking to add a subtle shine to your everyday life, glitter nails have got you covered.
- A Spectrum of Choices: You can opt for gentle, translucent sparkles that complement your work attire or dive into full-on holographic glitter that screams “party.”
- Flexible Style: By adjusting how much glitter you use and which colors you select, you can control the intensity of the final design.
This universal quality is what makes glitter nails so appealing. You’re in full control of how you want to project your style. Use minimal glitter for understated elegance, or go bold with layers of chunky sparkle to make a memorable statement.
Elevated Self-Expression
When you decorate your nails, you’re not just enhancing your external appearance, you’re telling a story about yourself. Glitter nail designs allow you to become the artist. Are you feeling carefree and adventurous? Try bold neon polishes paired with holographic glitter. Craving a dreamy, romantic vibe? Go for soft pastels laced with delicate shimmer.
- Mood Reflection: On days when you feel extra confident, a high-shine glitter accent can reflect your zest for life.
- Creative Playground: Indulge in patterns, shapes, or accent nails that let your imagination come alive.
This fusion of personal expression and creative flair makes glitter nail art so much more than just a simple manicure. Each layer of sparkle can reflect your mindset on any given day, turning your fingertips into miniature canvases that broadcast your personality.
Boost of Confidence
Have you ever noticed how fresh nail polish can lighten your mood? Glitter nails often magnify that effect. The shimmer you notice each time you type on your keyboard or lift a coffee mug can be a delightful reminder that you’ve invested in self-care. It’s like a small confidence boost sparkling at your fingertips.
- Small Yet Impactful: A subtle glitter accent on the tip of each nail might be all it takes to remind you of your personal flair.
- Joyful Reassurance: That flash of sparkle can gently whisper that you deserve to feel radiant, inside and out.
This synergy of glamour and self-confidence makes glitter nails a favorite for those seeking a quick pick-me-up. The next time you want that extra lift in your day, you might find that a glossy, glitter-infused coat does the trick.
Essential Tools and Materials for Dazzling Glitter Nail Art
Before diving into the design details, you need to assemble a kit of crucial nail supplies. Having the right tools ensures smoother application, better longevity, and less frustration along the way.
Basic Nail Care Essentials
- Nail File and Buffer: Shaping your nails is step one. You’ll also want to buff the surface slightly for a smoother polish application.
- Cuticle Pusher: Maintaining neat cuticles can make your glitter design look more refined and help the polish adhere better at the base.
- Base Coat: A high-quality base coat wards off staining and acts as a barrier between your nails and any heavy glitter.
Glitter Nail Polish and Accessories
- Loose Glitter: Ideal if you love customization. Fine, chunky, or holographic grains give you tons of creative room.
- Glitter Nail Polish: Perfect for quick application. These polishes already have glitter mixed in, helping you achieve an even spread without fuss.
- Top Coat: Essential for sealing in your glitter. A protective top coat ensures that your sparkles last longer without chipping.
Additional Tools
- Fine Detail Brush: Lets you precisely place glitter where you want or paint small shapes.
- Tweezers: Handy for adding embellishments like rhinestones or larger glitter pieces.
- Nail Art Sponges: Great for creating gradients and ombré effects, especially when working with multiple shades of glitter.
By starting with the right tools, you greatly increase your chances of finishing with a flawless set of glitter nails. A consumer nail industry report from 2024 highlighted a 35% rise in DIY nail art kit sales, a clear sign that more and more people, just like you, are embracing at-home manicures.
Top Glitter Nail Art Designs and Techniques
Now that your toolkit is ready, it’s time for the fun part: deciding on a design. Glitter nail art can range from understated elegance to full-blown sparkle. The choice is entirely yours. Below, you’ll discover several creative ideas that offer a blend of modern flair and timeless charm.
Glitter Ombré Nails
Ombré nails smoothly transition from one color intensity to another. Adding glitter elevates the effect, making it look like a cascade of stars on your fingernails.
- Gradual Transition: Begin with a base color, something neutral if you want an everyday look or a vivid hue if you’re aiming for drama. Then, blend glitter toward your nail tips, letting the sparkle gradually soften as it moves upward.
- Application Tip: A small makeup sponge can do wonders for blending. You’ll dab the glitter polish onto the nail, focusing on the tip and tapering off toward the center. This method ensures a smoother gradient than simply brushing the polish on.
One advantage of glitter ombré is that it’s relatively forgiving. If you make minor mistakes in blending, the sparkle can mask those imperfections, offering you an immaculate result with minimal stress.
Glitter French Tips
A French manicure never goes out of fashion, but adding glitter tips gives it a modern twist. This design provides the perfect balance between classic and playful.
- Classic with a Twist: You’ll maintain the natural or sheer pink base commonly seen in a French mani but swap out the white tips with sparkly glitter.
- Variation: Feeling adventurous? Go for bold colors or holographic glitter. Imagine a translucent pink base paired with iridescent tips, reflecting an array of colors whenever light hits them.
This approach to a French manicure offers a unique way to inject a dash of excitement into a timeless style. It’s particularly fitting for weddings, proms, or any social event where you want to appear elegant yet a tad unconventional.
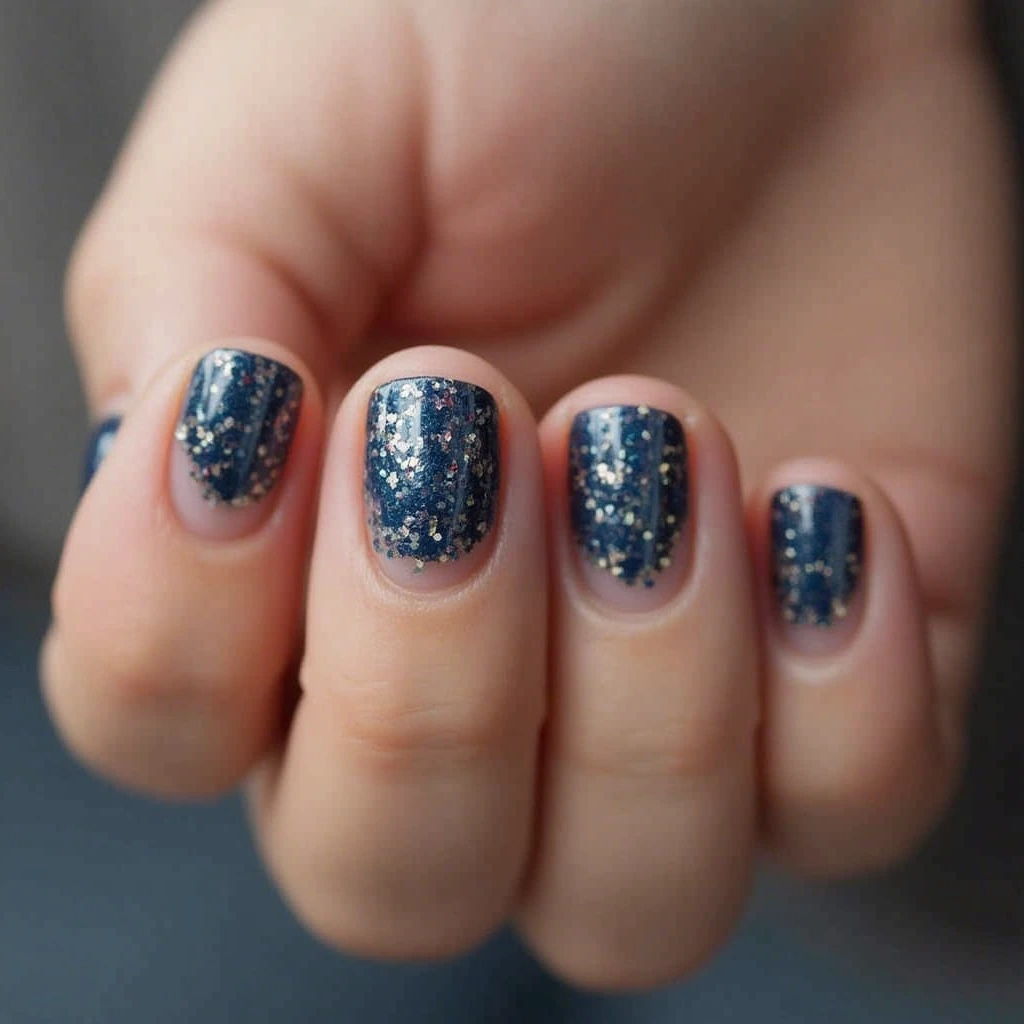
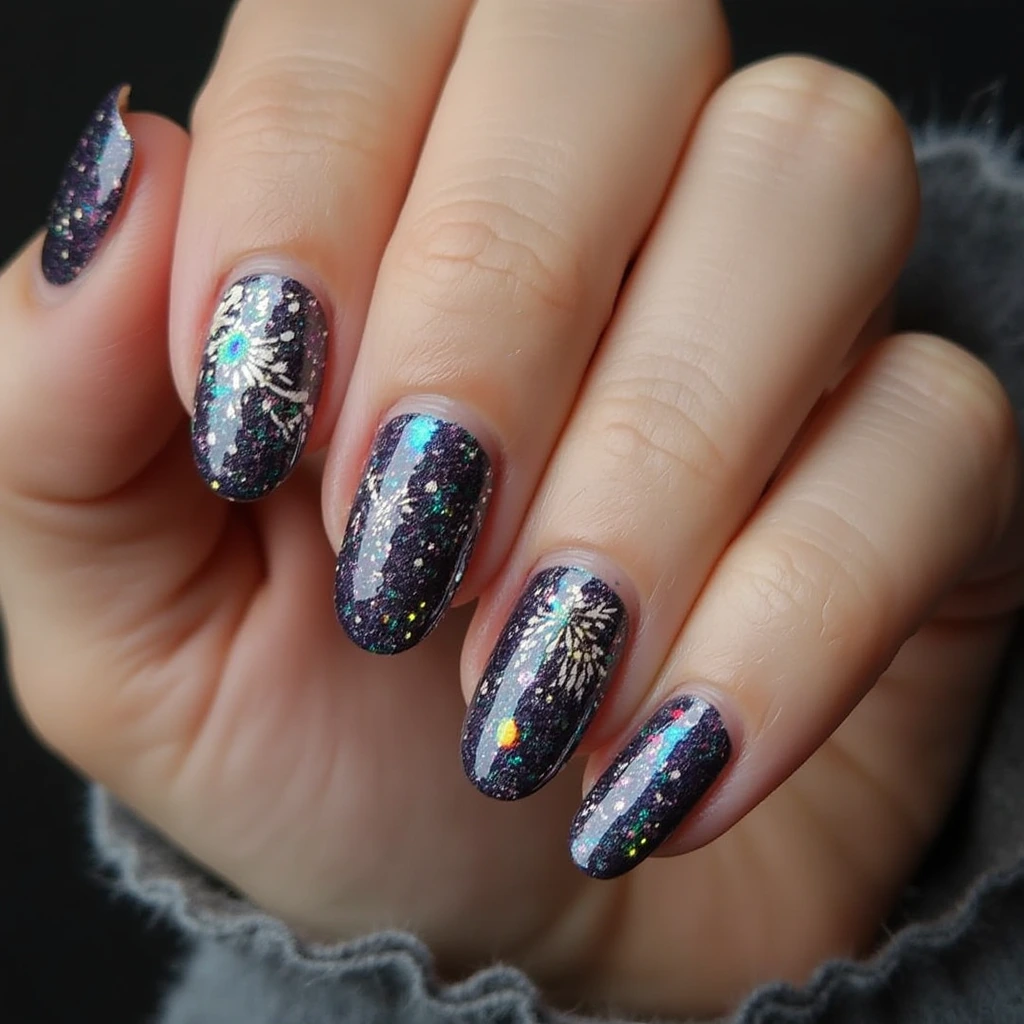
Starry Night Glitter
Dark, moody backgrounds can offer a striking contrast for shimmering specks, emulating a star-filled sky.
- Dark Base: Deep blues, purples, or blacks act as the perfect canvas. The glitter then takes on the role of stars illuminating your nails.
- Galaxy Finish: For an even more celestial look, add a mixture of fine silver or gold glitter to mimic scattered stardust. You can also drop a few chunky pieces in random spots for that 3D effect.
If you’re going for drama, the starry night design rarely disappoints. It’s a conversation starter and suits evening events beautifully. You could even incorporate tiny moons or constellation-inspired decals for an extra-special flair.
Geometric Glitter Accents
If you’re someone who loves bold shapes and modern aesthetics, geometric glitter accents can speak volumes.
- Bold Patterns: You can use thin nail art tape or stencils to create triangles, stripes, or zigzag patterns. Once you remove the tape, you’ll have distinct lines where you can add glitter.
- Pop of Sparkle: Instead of covering your entire nail, concentrate the sparkle within certain shapes. This approach draws the eye directly to those shining accents.
Geometric looks often suit trendsetters who appreciate a contemporary vibe. Plus, each nail can be a mini piece of abstract art, giving you near-limitless options to show off your creativity.
Metallic Foils and Glitter Combo
For those wanting maximum shine, combining metallic foil pieces with glitter is a bold choice.
- Foil Flakes: Gold, silver, or rose gold flakes lend a luxurious gleam to your nails.
- Glitter Overlay: After placing the foil, seal everything with a layer of glitter polish. The dual finish can capture light from various angles, producing a multi-dimensional effect.
This style is perfect for special celebrations like birthdays or holiday parties, where you want your nails to be the ultimate accessory. You’ll love how the foils and glitter create a reflective surface that commands attention.
Pro Tips for Long-Lasting Glitter Nails
Glitter nail art can be mesmerizing, but keeping it chip-free sometimes poses a challenge. The glitter itself can make nails more prone to wear if not sealed properly. Use the following guidelines to make sure your glitter nails remain pristine for as long as possible.
Proper Base Coat Application
A quality base coat doesn’t just keep your nails free from staining, it also helps the glitter polish bond effectively.
- Protection: It acts like a shield, reducing contact between your natural nail and the glitter.
- Smoother Surface: A base coat levels out imperfections, giving you a uniform surface.
By investing in a reputable base coat, you lay the groundwork for a longer-lasting manicure. Plus, you’ll find that removal becomes less tedious, since the glitter clings to the base coat instead of your nail bed.
Layering Technique
If you pile on one thick coat of glitter, you might end up with uneven coverage or a gummy consistency that chips easily. The secret is in layering carefully.
- Thin Coats: Apply a sheer layer of glitter polish and let it dry. Repeat if you want more sparkle.
- Dry Time: Patience is key. Let each layer fully set before adding another. This way, each coat bonds more effectively.
This gradual approach enhances durability and yields a refined finish that looks professionally done. You’ll appreciate the payoff when your manicure remains intact days longer than it would have otherwise.
Sealing with Top Coat
A sturdy top coat is your best defense against chips, dents, and fading.
- Chipping Prevention: The top coat forms a hard shell, protecting glitter from daily wear.
- Extra Shine: It can magnify the sparkle, making your glitter nails look even more lustrous.
Many top coats on the market are quick-drying, which makes your overall manicure time more efficient. Some people also choose UV or LED-cured gel top coats for an ultra-strong shield, especially if they want their glitter nails to endure for two weeks or more.
Gentle Removal
Removing glitter can sometimes be trickier than applying it. If you peel or scrape at the glitter, you run the risk of damaging your natural nails.
- Foil Wrap Method: Soak a cotton pad with nail polish remover, place it over your nail, and wrap it in a piece of foil. Wait about 10 minutes before sliding the foil off. The glitter should come off more easily.
- Peel-Off Base Coat: Another option is a specially formulated base that allows you to peel off the glitter without harsh chemicals.
Gentle removal not only protects your nails but also makes the entire process more pleasant. You’re more likely to enjoy experimenting with different glitter looks if you know removal won’t be a daunting task.
FAQ on Glitter Nail
Below, you’ll find answers to a few common questions that often come up when people explore glitter nail designs. Incorporating best practices ensures that you can confidently wear your sparkly creations while maintaining healthy nails.
- Can glitter nail polish damage my natural nails?
If you prepare your nails properly, using a base coat and treating them gently during removal, glitter nail polish shouldn’t damage your nails. The issues arise when you scrape or peel off the glitter without softening it first. - How do I keep my glitter nail art from chipping?
The key lies in layering thin coats of polish and sealing each layer with a reliable top coat. Another pro tip is to reapply a clear top coat every two or three days, which can noticeably extend the life of your manicure. - What’s the easiest way to remove glitter nail polish?
The foil wrap technique stands out as one of the simplest methods. Soak a cotton pad in a quality nail polish remover, press it onto your nail, then wrap the finger in foil. After a short wait, the glitter should slide off with minimal effort. - Can I mix different glitter textures in one nail design?
Absolutely. Combining fine and chunky glitters can add dimension and visual appeal to your design. You can even mix metallic foils for an extra element of shine. - Is there a trick to making the glitter look more vibrant?
Try painting a solid color that complements your glitter before you add the sparkle. For instance, if your glitter is gold, placing it over a gold or neutral base can amplify the shimmer and depth, giving you a richer outcome.
Conclusion + Call to Action
Glitter nail art truly offers a world of creative possibilities, granting you the freedom to reflect your mood and style in ways that a standard manicure might not match. From the subtle gradients of glitter ombré to eye-catching geometric angles and starry-night inspirations, each design can be customized to reflect your personal flair. By gathering the right tools, paying attention to proper layering, and using high-quality base and top coats, you can enjoy a long-lasting, salon-like sparkle on your nails without ever leaving your home.
More than a decorative choice, glitter nails embody a boost of self-confidence. Each time you catch a sparkle out of the corner of your eye, you’re reminded of the time you invested in treating yourself with a bit of fun. It’s like carrying a tiny source of excitement with you, a little wink of joy whenever you type a text message, hold a latte, or wave hello to a friend.
If you’re ready to showcase your creativity and let those fingertips dazzle, your next step is simple. Pull out your polishes, grab that loose glitter, and give yourself permission to have fun. Document the process if you like. Snap some photos to track your progress and show off your sparkling creations on social media. Encourage your friends to join in too, turning a simple manicure session into a mini celebration. You may even discover a shared love for glitter art that becomes a fun weekend tradition.
Above all, remember that glitter nail designs aren’t just about aesthetics. They’re about expressing individuality and treating yourself to something special. Each stroke of sparkle you apply can be a small vote of confidence and self-love. So, seize the moment. Your nails are blank canvases just waiting for a shimmer-laden adventure. You have the tools, the ideas, and the mindset to make it happen. Let those fingertips shine and reflect the radiance that’s already within you.